Hiding the PS5 without losing performance
I’m a bit of a gamer. Obviously, I spend my time doing a lots of things, but relaxing with a good game is one of my favorite hobbies. I don’t have any horse in the race as far as Xbox vs. Playstation goes, but I tend to prefer Playstation simply because it has more exclusive titles I’m interested in. Exclusive titles at all are arbitrary and frankly annoying, but it is what it is.
When the PS5 was first announced, I hated how it looked. To be fair, I do admire the idea of making a game console an interesting piece of design. Funnily, I think this was Microsoft’s intention with the Xbox 360 many years ago, but they have since moved on to big black boxes while Sony dove into the deep end of unique character with the PS5. I think the design of the PS5 could be very appealing to many people, but it’s not for me.
With the carefully tuned balance between performance and heat of modern consoles, this posed an interesting problem. How could I hide my PS5 while making sure it didn’t choke to death?
 There’s a PS5 in there
Making the PS5 look better in my living room
I did explore this option a little bit. What if I could make the console look different? This turned out to be fairly tricky around the console’s launch, though. Nowadays, there are some pretty decent third-party panel and sticker options that change the silhouette and colors of the PS5, so if I were doing this project today, this might be more viable, but no such luck at the time.
 The PS5 is big
I also thought about biting the bullet and just letting the PS5 be visible on an open shelf as-is, but one fundamental issue with the PS5 for me is it’s quite large, even larger than than my pervious PS4 Pro, which I already thought was pretty bulky. The PS5 is actually just about the same size as some console-form-factor PC cases, which can be built to be even more performant than a PS5. Food for thought for a future project, perhaps. Anyway, this meant that if the console was visible at all, it would draw attention, and I decided hiding it was the better plan.
Sacrifice as little performance as possible
So, hiding the PS5 was straightforward enough, but making sure it could still get fresh air and exhaust the hot air was trickier.
I began googling, “vented tv stand”, “media center airflow”, “TV stand… with holes?”, etc. I found some options (although surprisingly, not as many as I expected), but I was still struggling. BDi’s media centers were particularly appealing, until I saw the price. I’m sure their products are very good, and they look great, but roughly $3000 was a tough sell, especially when I lived on a third floor apartment with no elevator at the time, and I would need to cart this massive hard wood piece up the stairs.
I did find one or two cheaper options in the few hundred dollar range that were kind of similar to BDi’s offerings, but they just weren’t grabbing me. Their style was either too far off from what I wanted, reviews weren’t very good, or the dimensions wouldn’t work.
I decided it was time to break out the saw.
The Build
Unsurprisingly, IKEA is a favorite of mine and my partner’s. Their furniture is pretty inexpensive, but has held up mostly quite well for us (except their couches), and it fits our style. We actually already had an IKEA Besta on legs that we were using as our TV stand at the time, so I decided to look no further.
Of course, the Besta does not have the vents I would need by default. But another benefit of IKEA is their stuff is very easy to hack apart, and if I messed up, it wouldn’t be some huge loss. I came across AC Infinity, a company all about ventilation fans for exactly the kind of project I was taking on. I did briefly think about just doing this myself with some computer fans and a microcontroller. After all, that’s basically what their products are. At this point though, I wasn’t 100% sure that adding fans would work to adequately cool the PS5, so I didn’t really want to add even more prototyping and development time. Down the line, I’d like to come back to an even more DIY approach here, but for the moment, I decided to keep things simple and get to a testable solution as quickly as possible.
My plan was pretty simple: one intake fan on the bottom and one exhaust fan on the side. I also decided to mirror this on both sides of my Besta to allow for exhaust for our Nintendo Switch or anything else we might want to hide away in the future. I chose this configuration for a couple of reasons:
- It made the most sense since hot air naturally rises, and exhausting downward would be fighting that for little reason.
- It mirrored the PS5’s built-in exhaust pattern. The PS5 exhausts at kind of a downward angle to the rear, and since I would have it on its side, all the hot air would be pushed perfectly into the exhaust fan I was adding to the cabinet.
The main downside of this configuration is dust. Intaking from the floor is pretty much the worst option if I wanted to avoid dust buildup, but I decided that wasn’t a dealbreaker. The fan grates do a decent job of stopping dust on their own, and I can always use a dust filter as well. In practice, this really hasn’t been as bad as I worried it might be. We also keep our Besta raised up off the floor by several inches, so I’m sure that helps.
I love it when a plan almost doesn’t come together
All and all, I figured it would be fairly simple. I just needed to saw four holes. Since IKEA uses essentially really strong cardboard for most of the Besta, cutting the holes would be easy with a drywall saw.
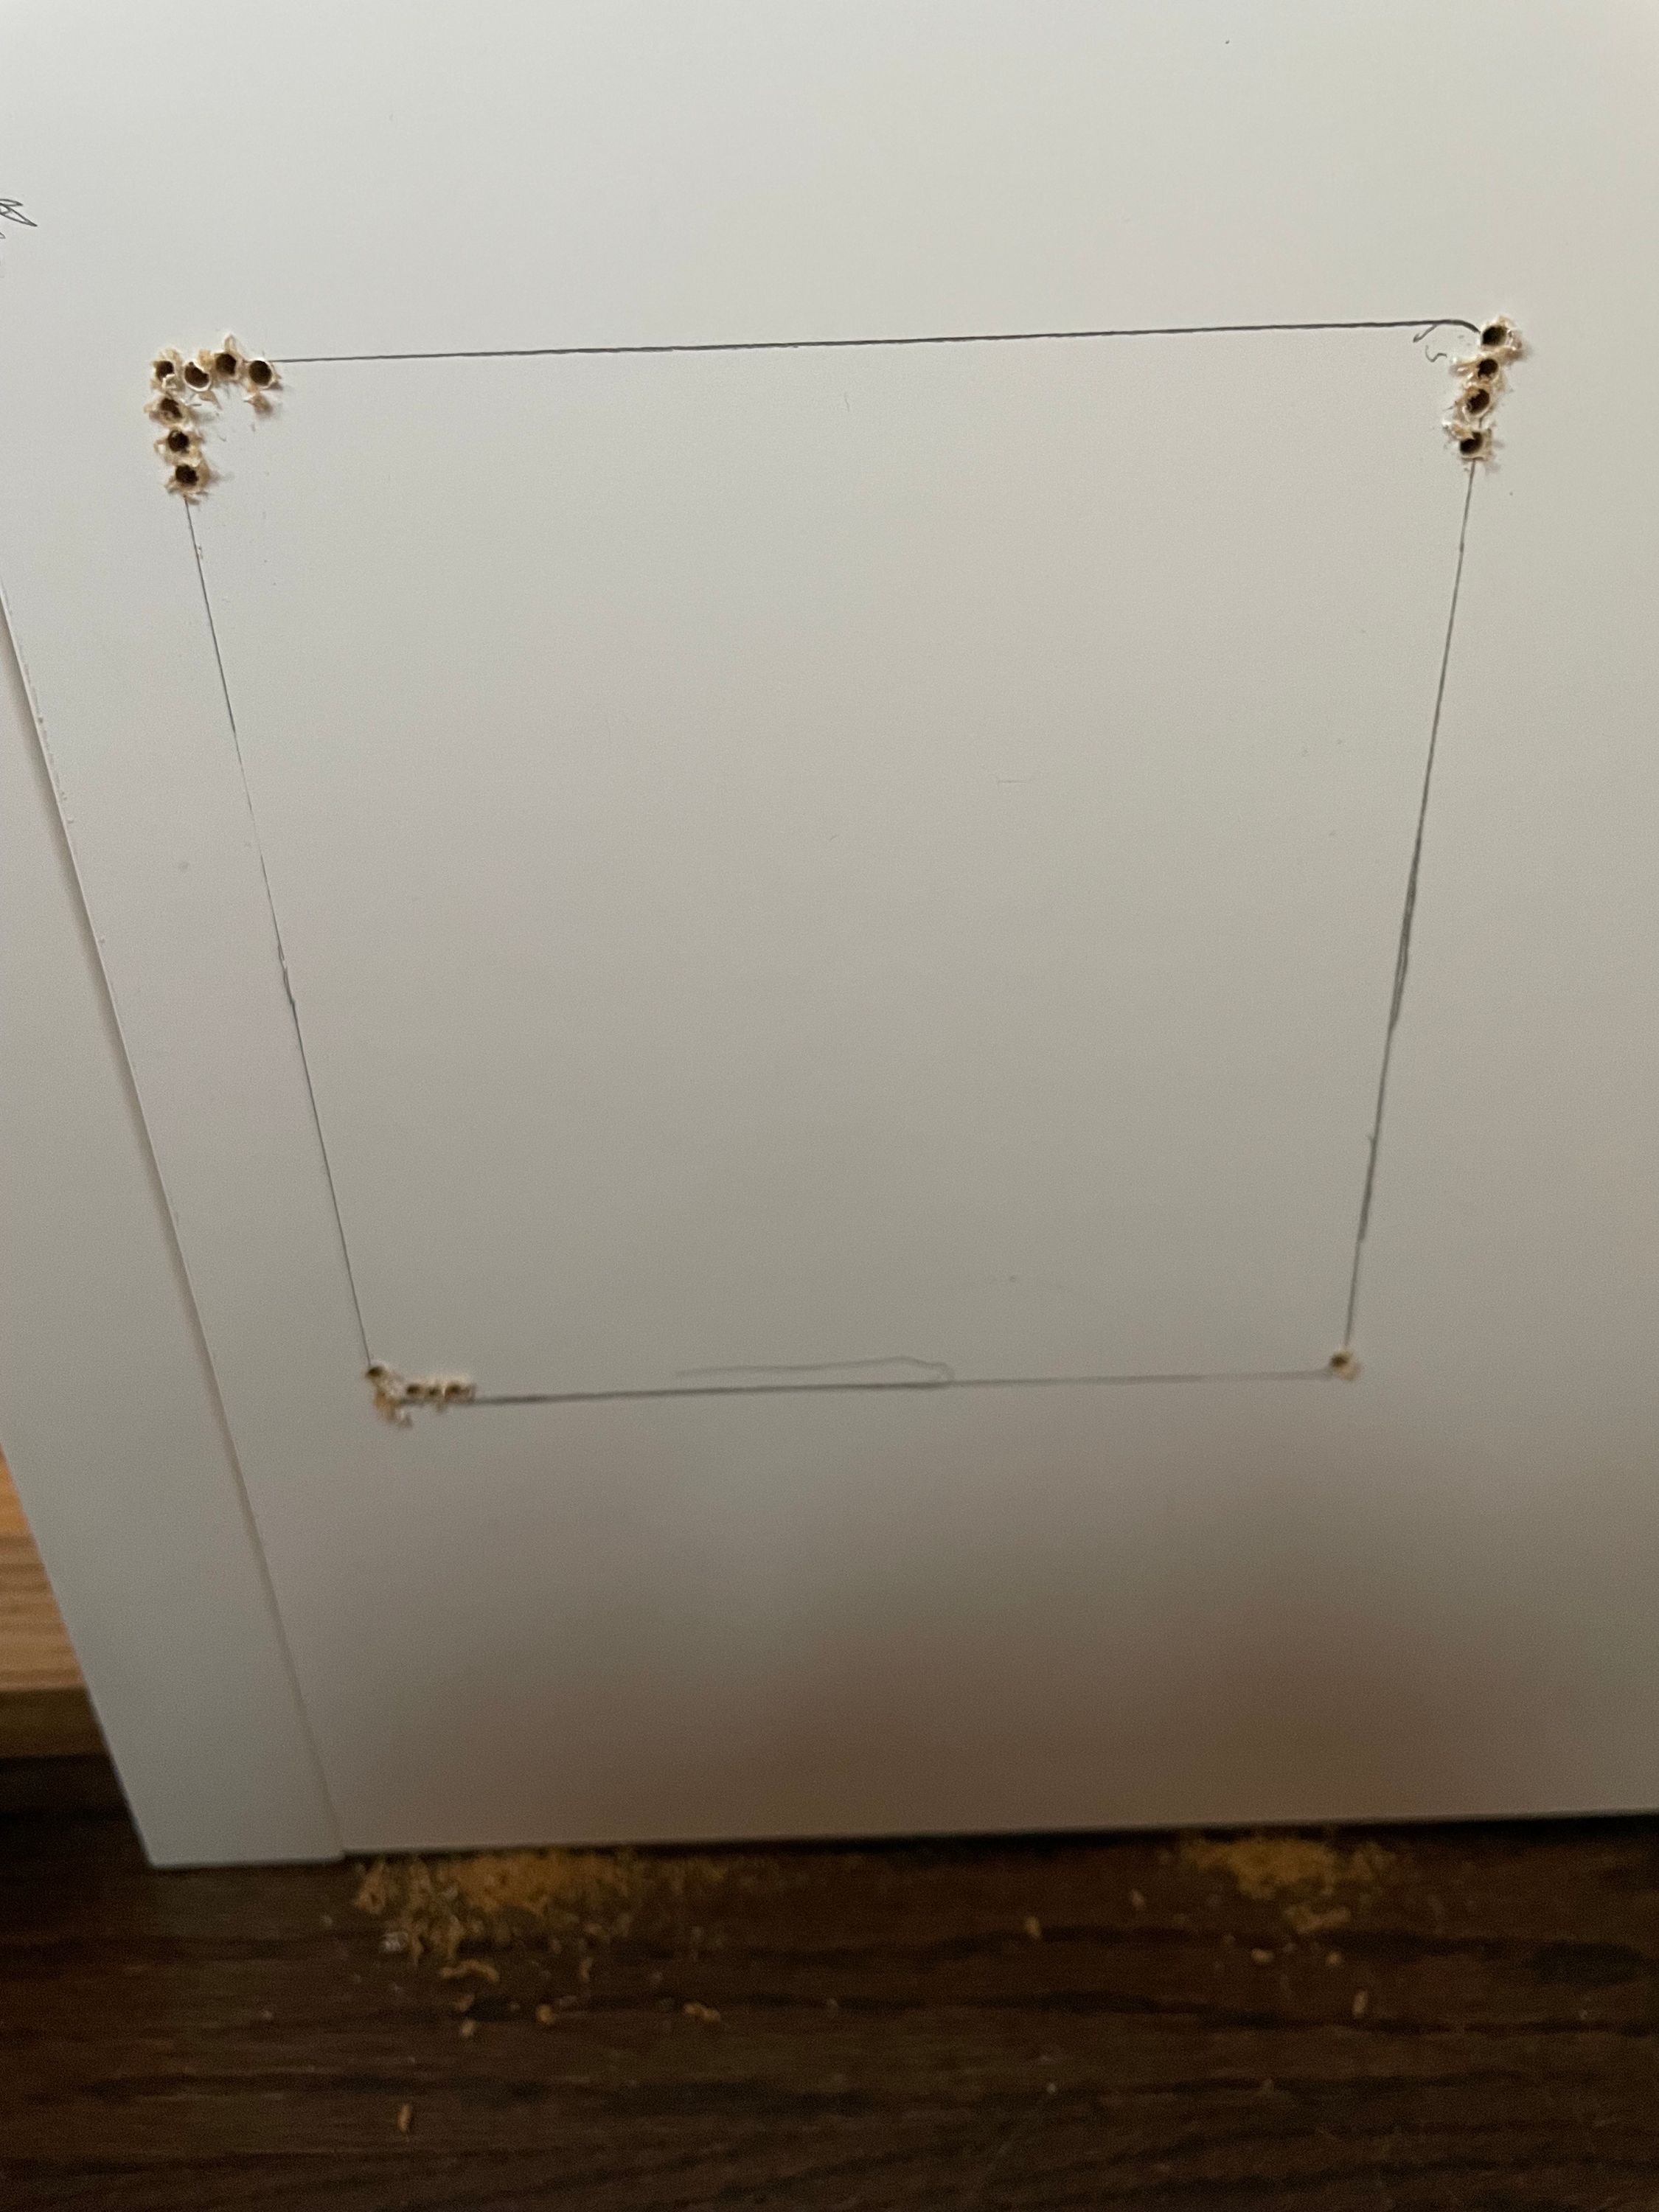 Pilot holes
That was the plan, at least. When I got to sawing though, it was hard. So hard in fact, I was close to giving up. I thought I must have gotten something wrong somehow. How was cutting through cardboard making me drip with sweat and my hands ache?
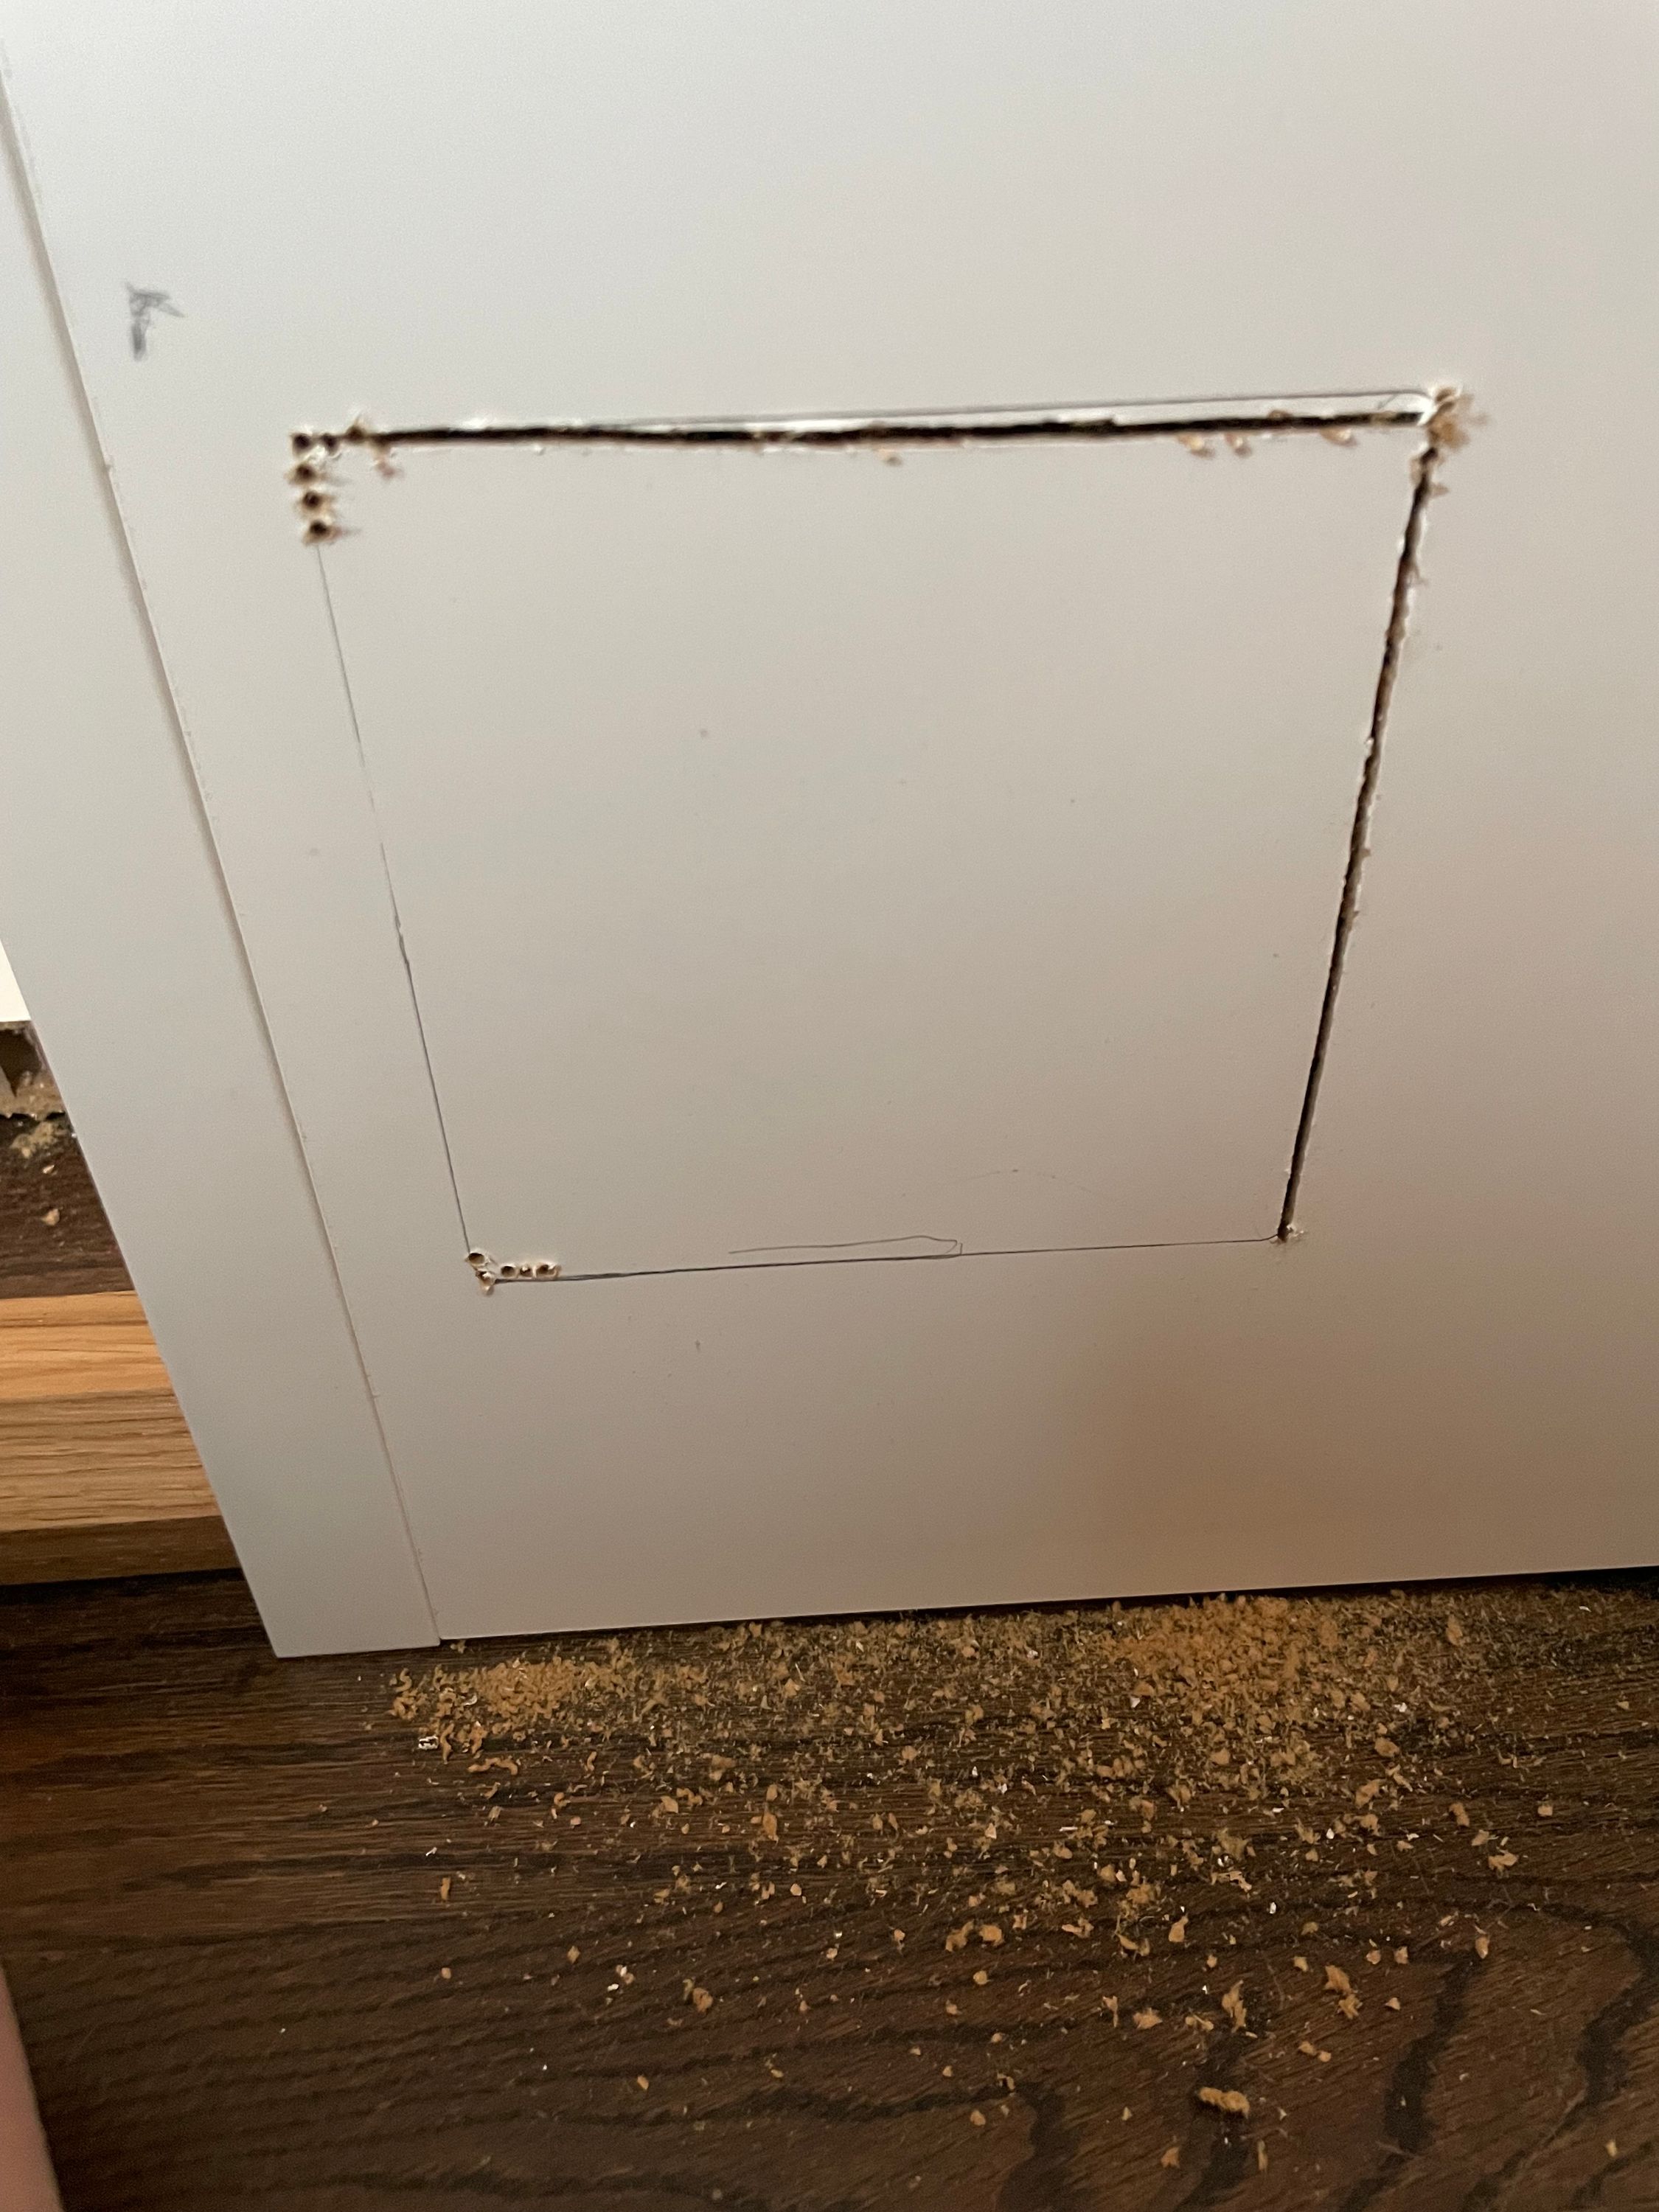 Sawing
Well, just for my own sanity, I decided to try one of the other sides of this hole, and I was able to cut it out with almost no effort at all. Where I had spend at least half an hour sawing away at the first side, the second side was done in less than 10 minutes. So what the heck?
When I was measuring where to put the holes, I didn’t really have any super scientific method. It turns out I guessed just slightly wrong for that first hole. Actually, just one side of that first hole. The other three sides went about as easily as I expected, and then I realized that I was cutting through one of the few real pieces of wood used in the Besta by just a bit, but it was enough that I had been cutting a 120mm line through hardwood with a drywall saw.
I felt silly, but mostly, I was glad it was just one side of one hole. For basically guessing where to put the fans, things could have been so much worse. By the time I figured all this out, I was already about 2/3rds of the way done with this line, so I knuckled down and finished the cut, exhaustedly tearing out a messy square of 95% cardboard and 5% wood.
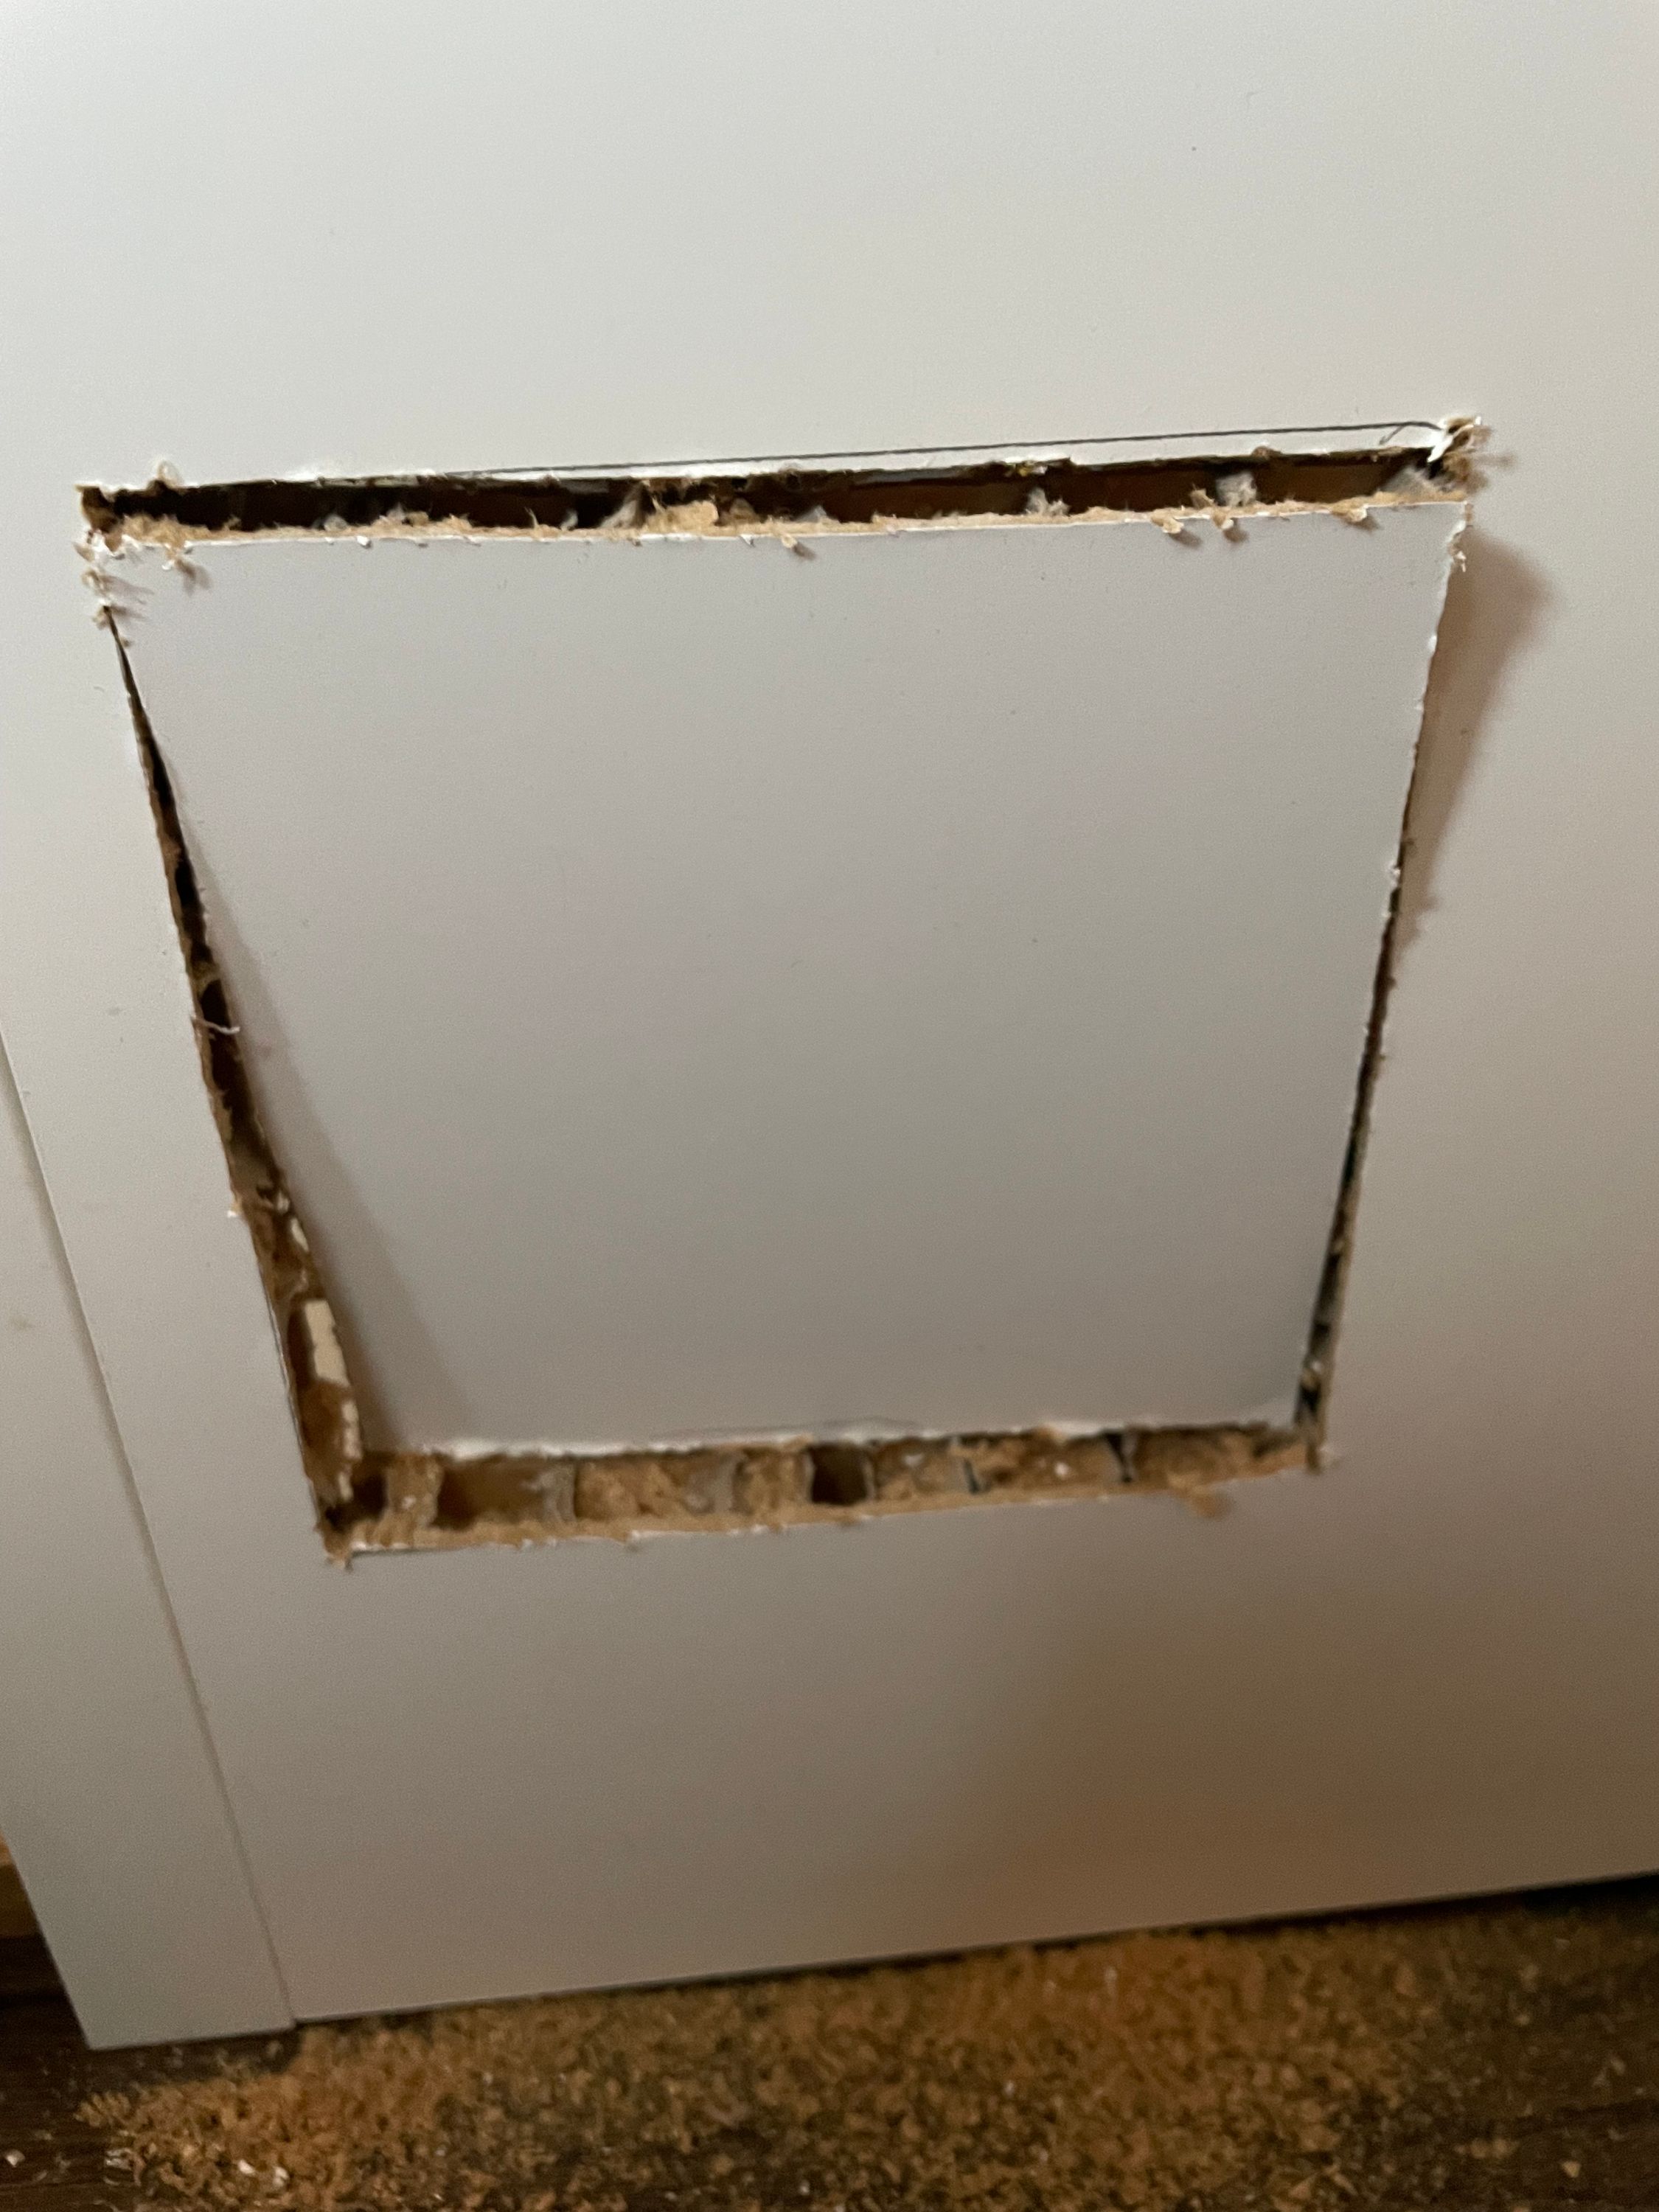 One of the square cutouts
With the holes cut, installing the fans was a breeze (pun fully intended). I just stuck them in place and plugged them into AC Infinity’s basic controller. I tested to make sure things were working, cleaned up the cuts a bit (certainly not that well), and set everything up. I used black fan grilles for the test, but I later switched to white when I knew things were baseline working.
 Testing things
It worked! It worked really well, actually. The fans were barely audible, the PS5 never gave me any warnings or showed any signs of struggling. I suspect my setup is actually much better for performance than a typical open self. Actively moving the air into and away from the PS5 in an otherwise closed system makes sure its not “stewing” in its own hot air.
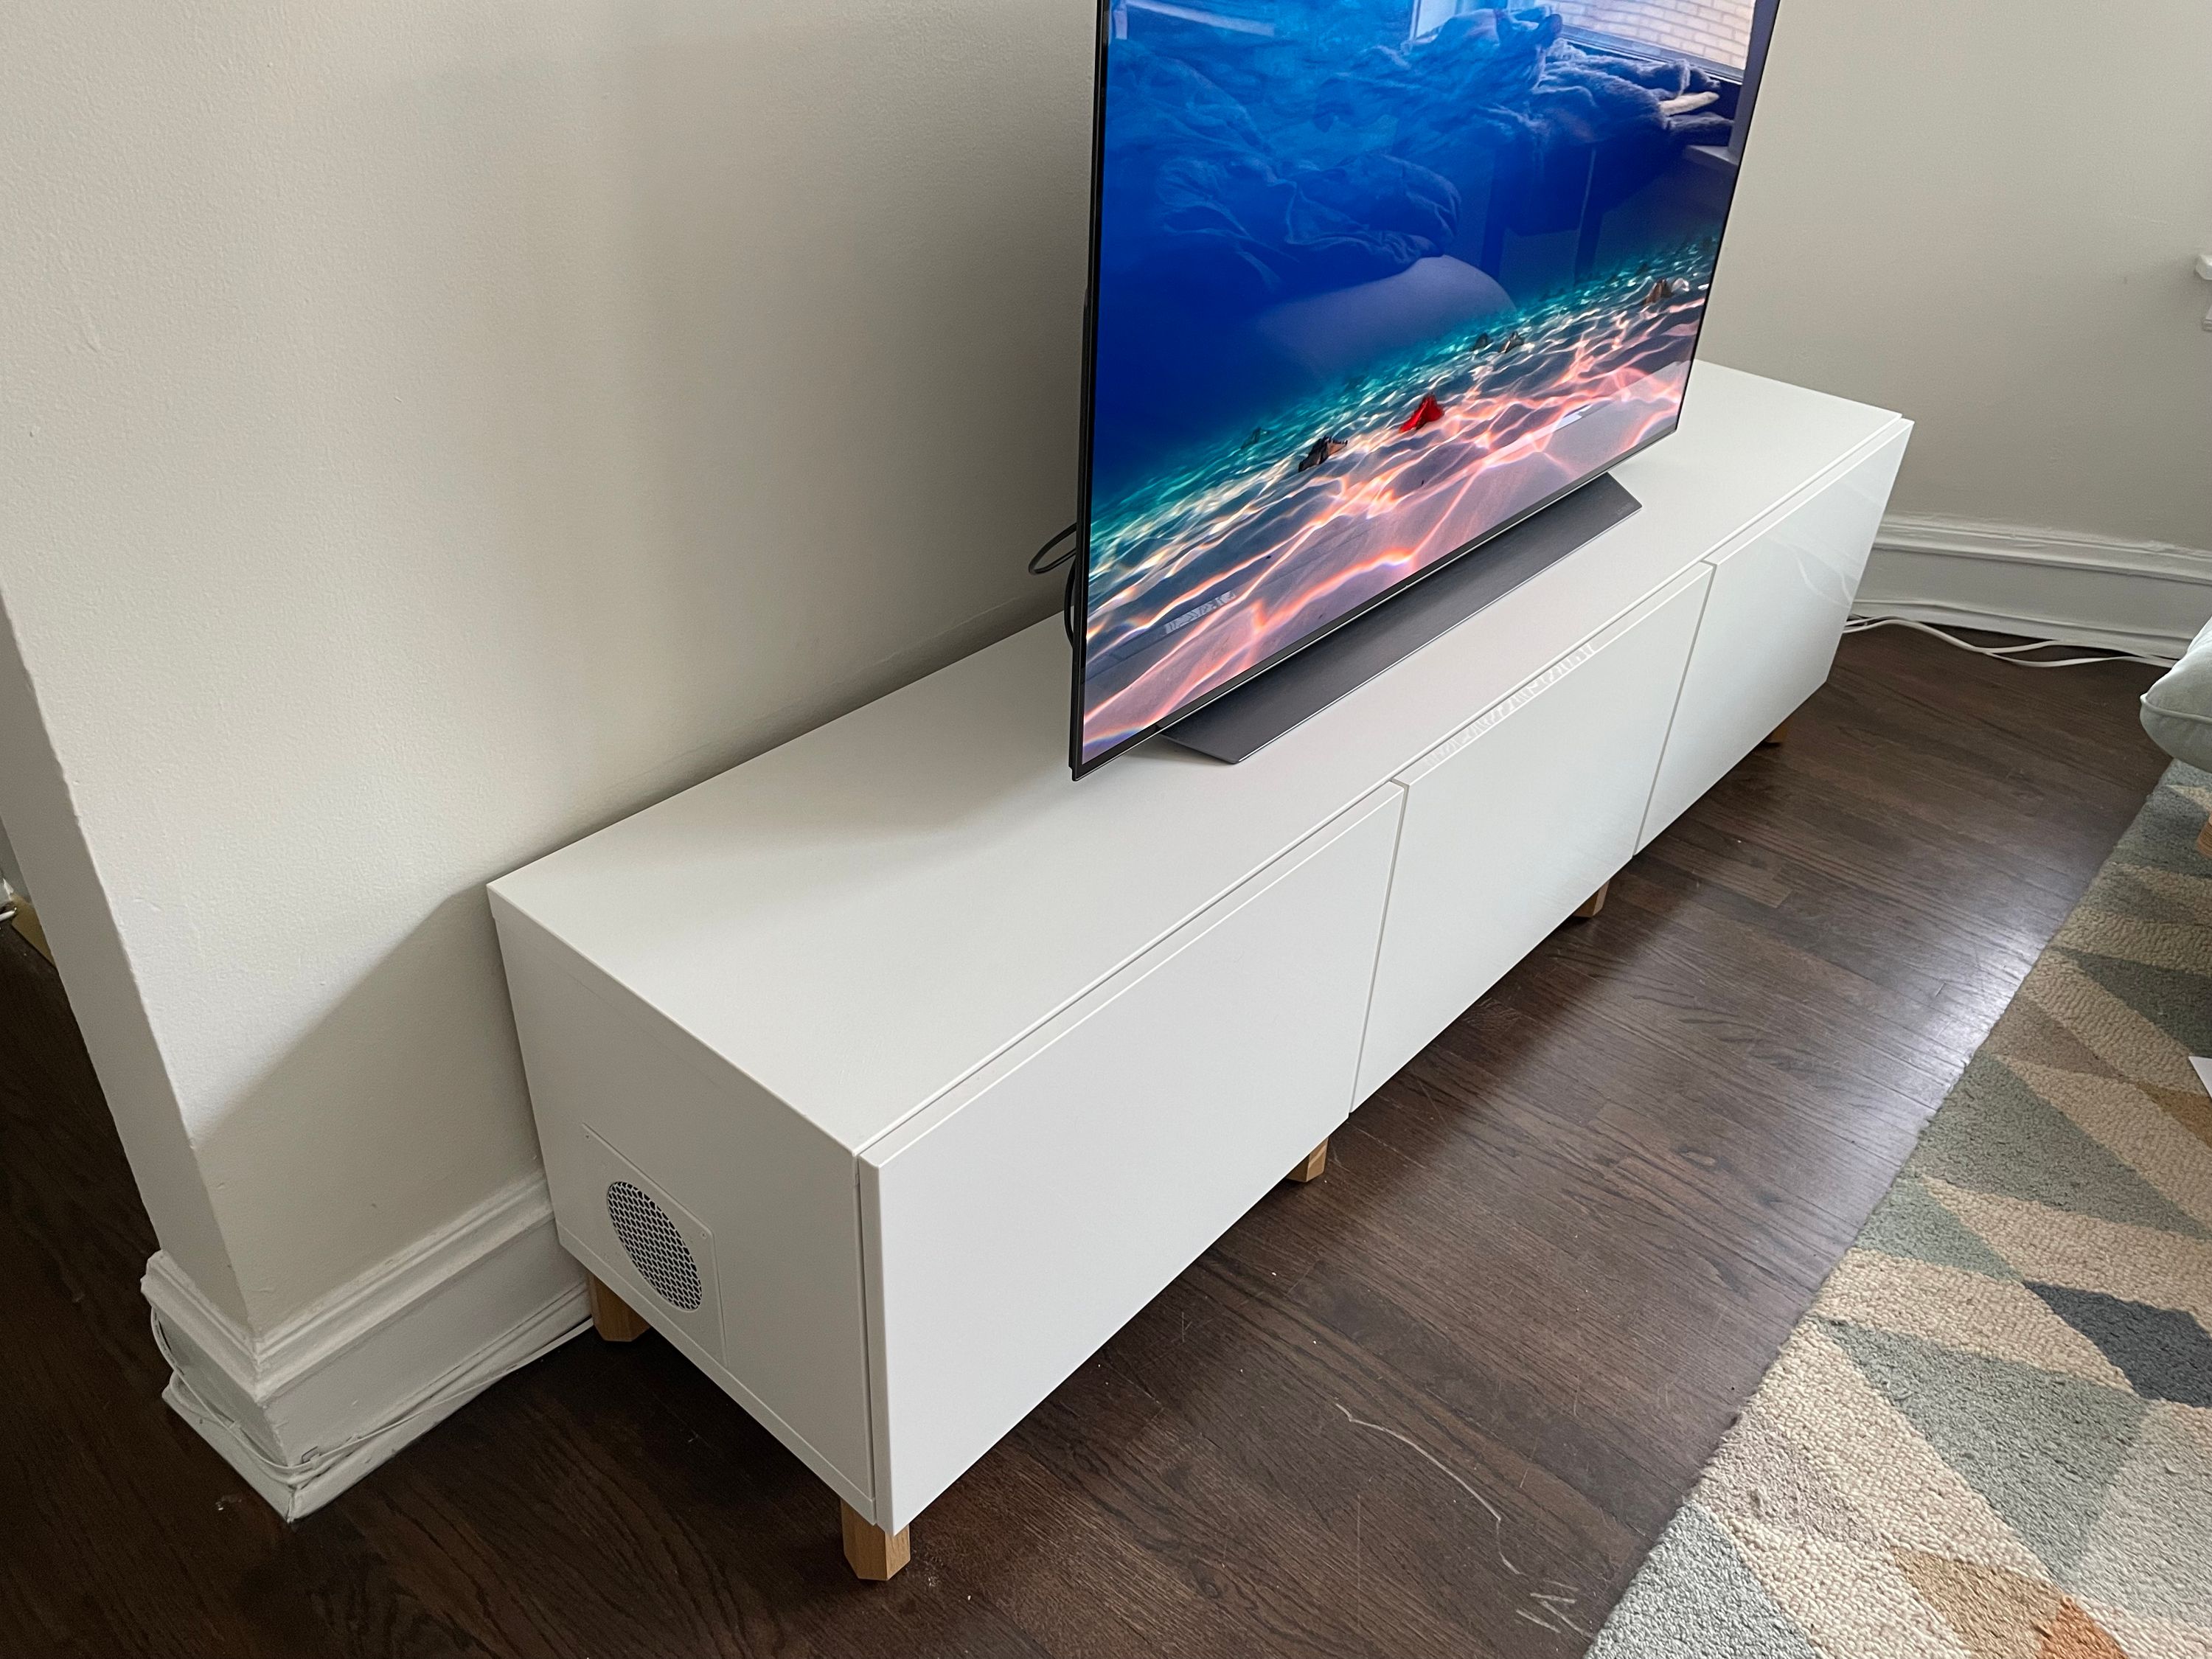
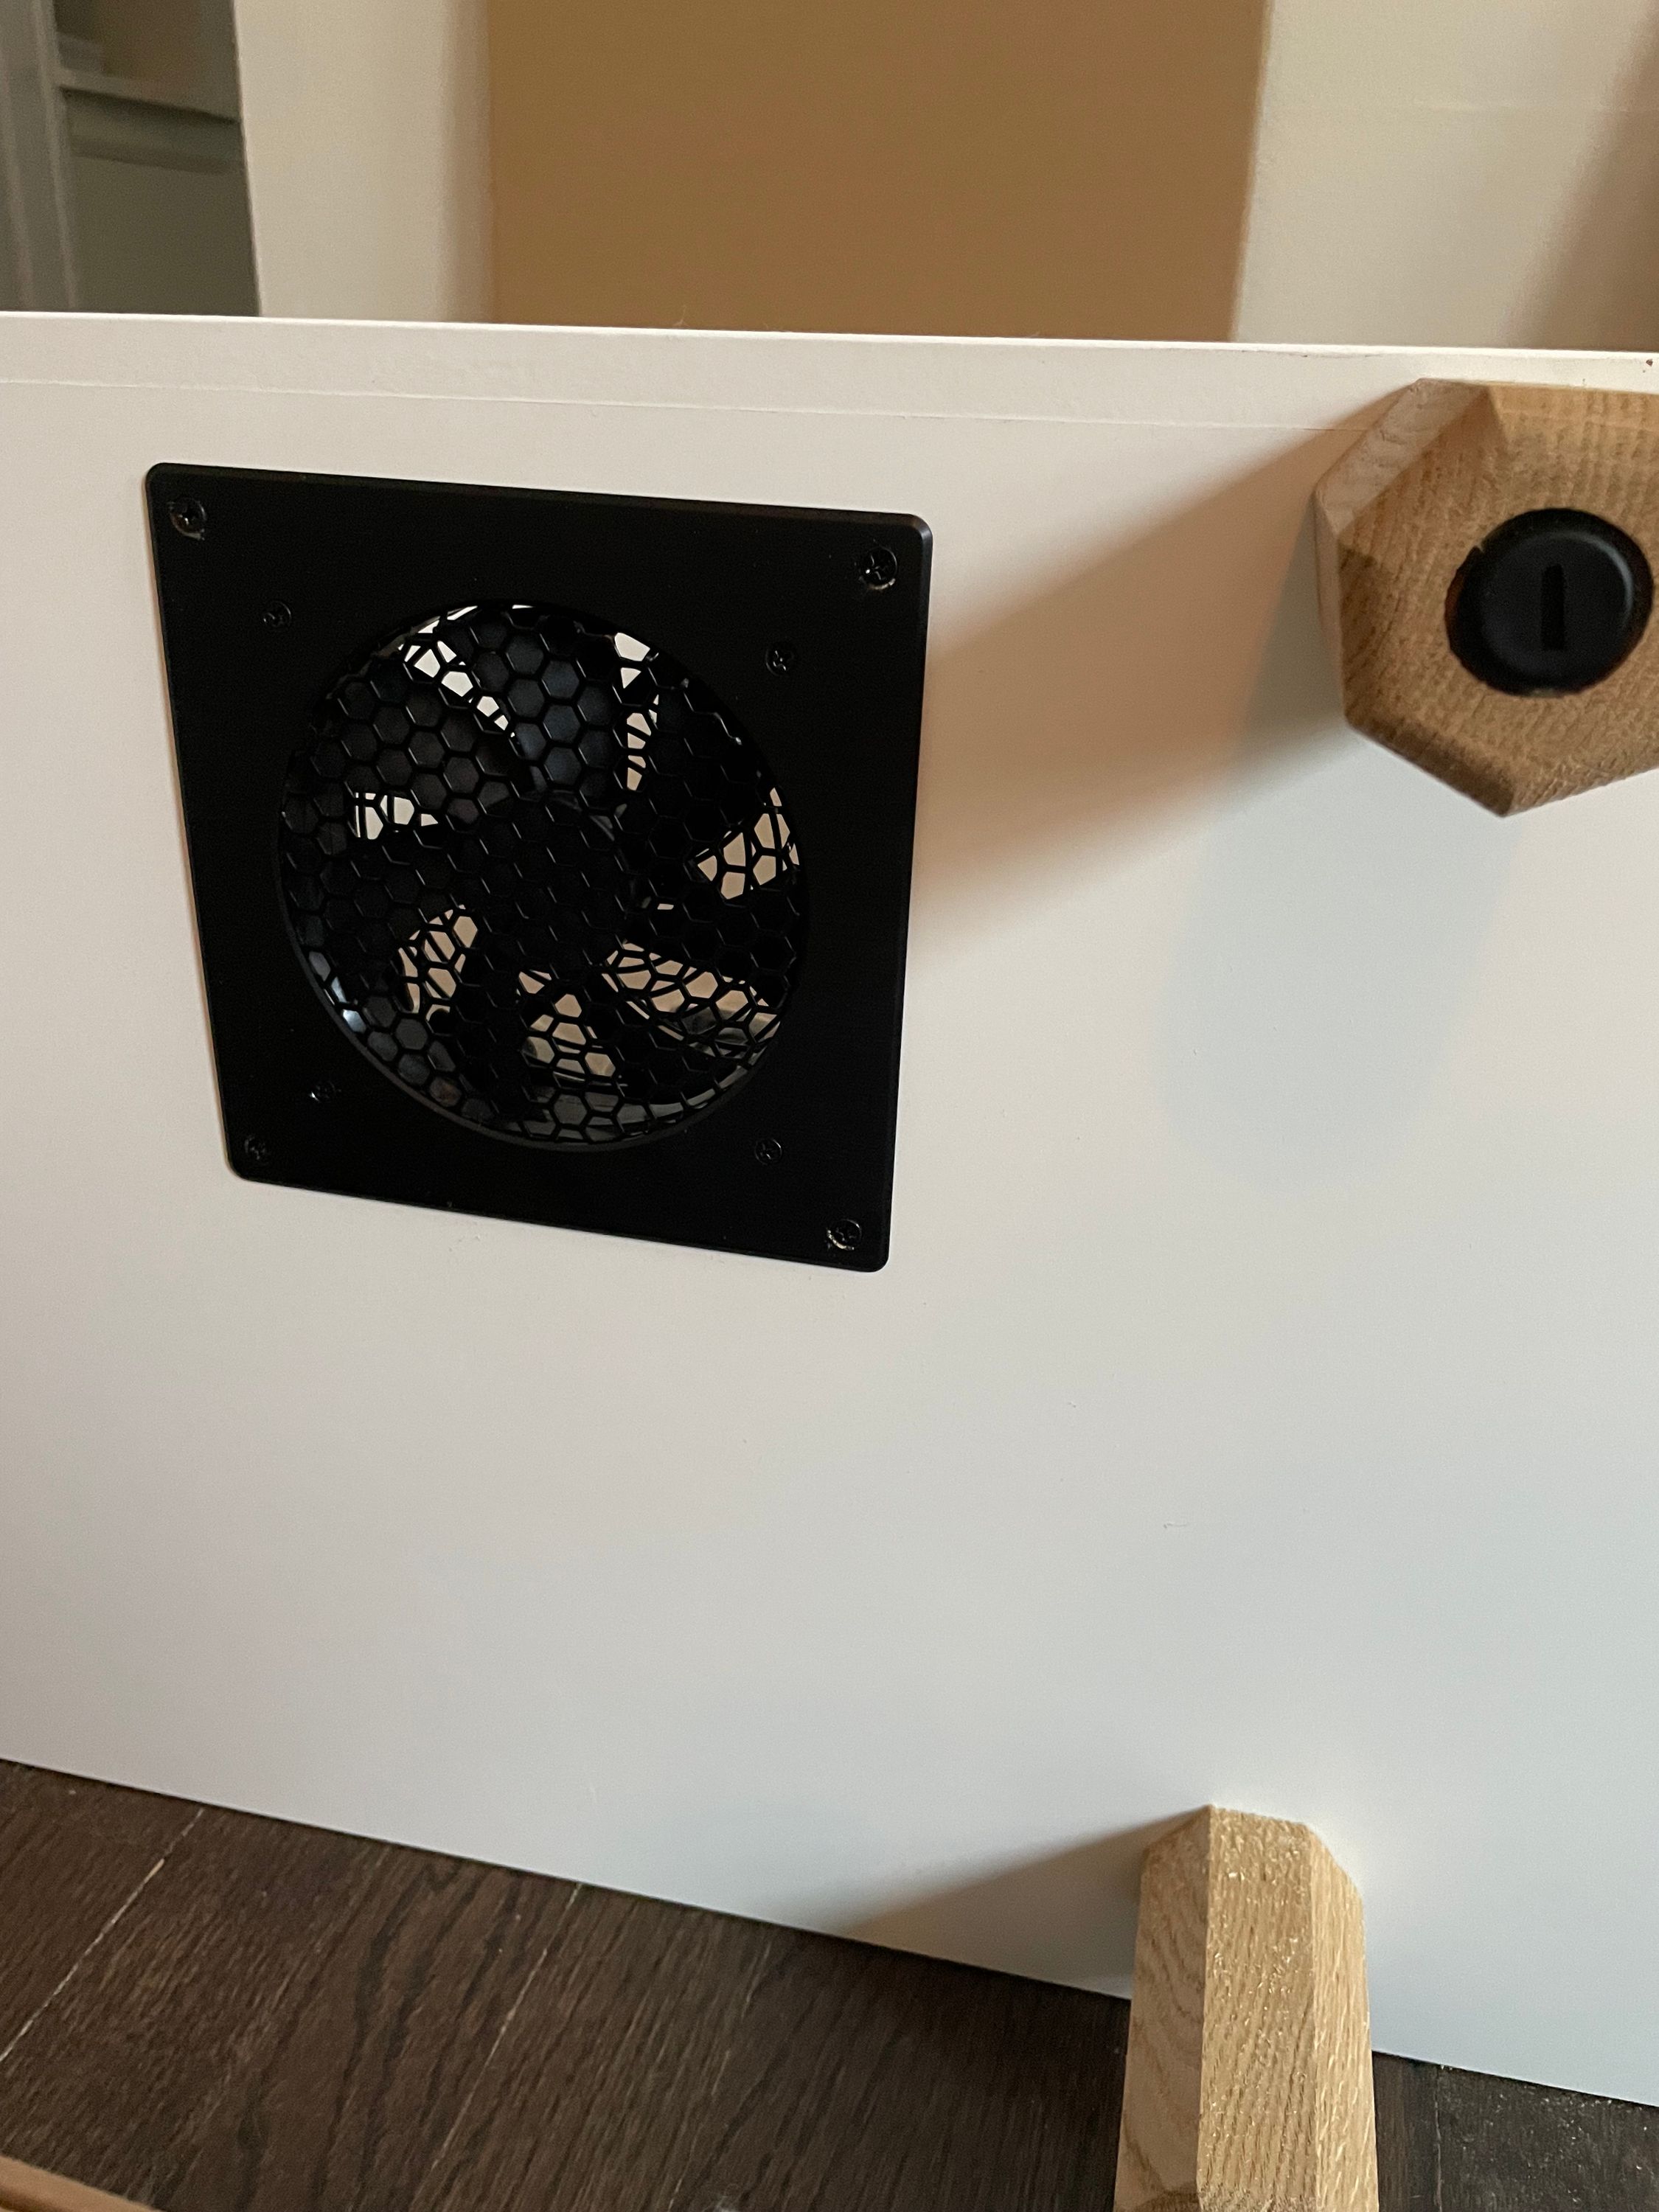
The final product
The setup two-ish years later
I still use the exact setup with basically no changes. Everything still works, and my PS5 still runs perfect. I try to remember to clean out the dust every few months, but again, this really hasn’t even been the problem I thought it might be. I went over six months without cleaning and things weren’t even that bad.
Should you do this yourself? If you want to. It’s really not too hard, and I’m very happy with the results. The only noticeable part of this mod from the outside is the fan grilles on either side, but it’s one of those things that might seem super noticeable to you as you finish it, but you quickly forget they’re there. I’ve also never had a guest notice them. Sometimes I point them out when talking about this project, and people are almost always surprised - they’re just not very noticeable in day-to-day conditions. If you were really concerned about them, you could put the exhaust facing down like the intake, but then you run the risk of recirculating hot air. It might still be okay, but it’s not ideal.
Anyway, I remain a big fan of this setup. I plan to keep using this Besta for the foreseeable future. At some point I may take another look at BDi’s options or redo things to be cleaner, but these would be purely “nice-to-haves”. I’m still really happy with my hidden PS5.